How to import Analyze images
Analyze images consist of a header file and an image file. The header file contains image metadata, including image dimensions and voxel dimensions, and has extension .hdr. The image file contains voxel data and has the extension .img.
To import an Analyze image into EASY MEASURE, go to your image list by selecting Images from the Resources menu. Next, find the icon in the top right hand corner of the page that looks like a computer with an upward pointing arrow above it. Click the icon to open the Import an image panel.
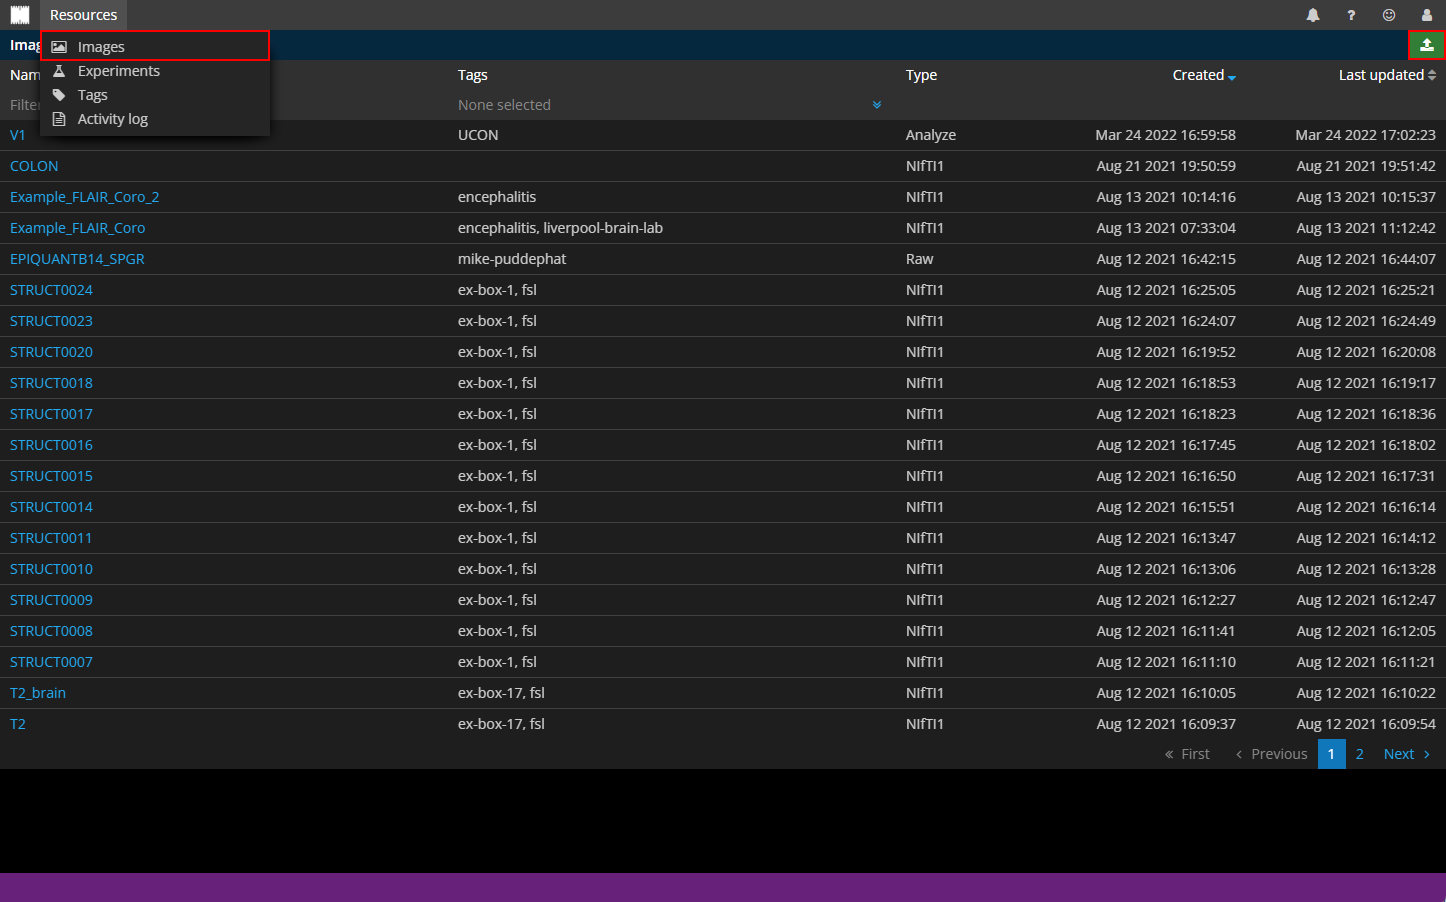
Figure: Image list, with import image icon highlighted
Initially, the Import an image panel displays a list of image type options. Select the Analyze option to import an Analyze image. Once the Analyze option has been selected, a number of input fields are displayed. Each of these fields is described below.
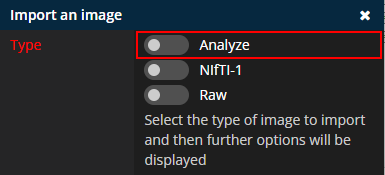
Figure: Import image panel
The Details section of the Import an image panel contains a file picker and tag selector.
Click the Browse... button to find and upload an Analyze image from your computer. It is important to note that you must select both the header file (with extension .hdr) and the image file (with extension .img) at the same time. Files compressed using gzip (with extensions .hdr.gz and .img.gz) can also be uploaded and are decompressed during the import process.
If you have previously created tags, these can be assigned to your image using the tag selector. Click on the blue, double downward arrow to the right of the text None selected to display a dropdown where you can select one or many tags.
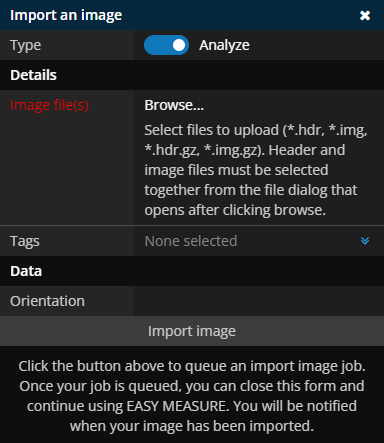
Figure: Import image panel with Analyze selected
In general, it is not necessary to provide any further information in order to import an Analyze image into EASY MEASURE. Metadata, such as image dimensions and voxel dimensions, can be automatically read from the Analyze header file. However, voxel data orientation cannot always be reliably extracted from metadata found in an Analyze header file. Therefore, in the Data section of the Import an image panel, you can optionally specify an orientation.
If Orientation is left blank, EASY MEASURE will try to determine the orientation of voxel data using the supplied Analyze header file. Otherwise, a 3 letter code containing the letters R or L, A or P and S or I (in any order) can be specified to determine the orientation of voxels within the image.
Once all of the Import an image panel fields have been populated, click the Import image button to queue your import image job. Once your job has been queued, you can safely close the Import an image panel. You will be notified when your image is ready to view.
Once an image is imported and ready to view, you should check that image dimensions, voxel dimensions and orientation are set correctly.
Example
An example Analyze image is provided below:
Once you have downloaded uterus.hdr and uterus.img, you can import the Analyze image into EASY MEASURE via the Import an image panel as described above and shown below. Note that the orientation has been manually set to ASR.
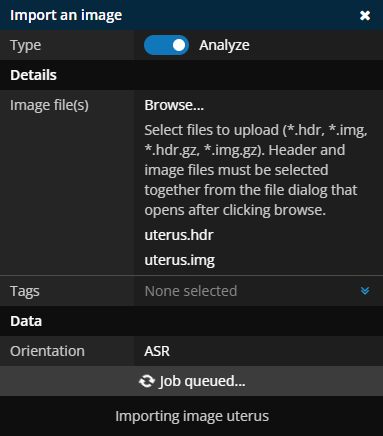
Figure: Import image panel with Analyze image details
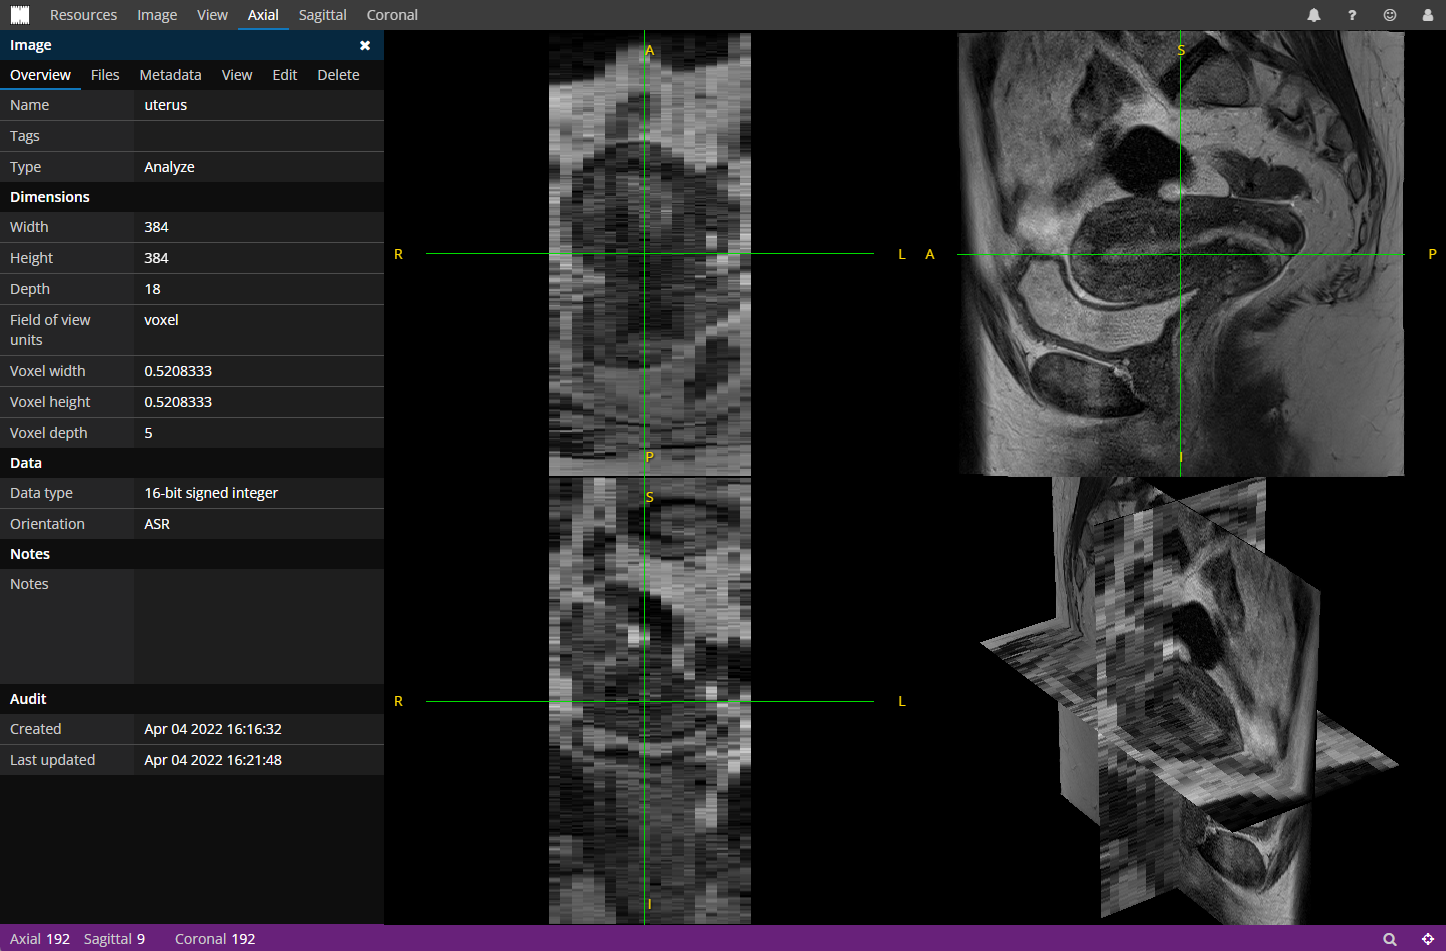
Figure: Analyze image displayed in EASY MEASURE. Image dimensions (384 x 384 x 18) and voxel dimensions (0.5208333 x 0.5208333 x 5) are automatically retrieved from image metadata found in the Analyze header file. The orientation, ASR, was manually specified.